Van Conversion Part 5
Van Conversion Part 5 is the end of the end for my blogs about converting a delivery van into a camper.
Just like Disney Land, I expect the camper to change and evolve as time goes on. I’ll update that process as it unfolds in the future. But for now, on with the “end” conversion, well, at least this phase, anyway.
Where Form Meets Function
Architect Louis H. Sullivan first used the phrase “form (ever) follows function” and it helped define another way to design things. Some people think this phrase means that something has to be useful but shouldn’t be pretty, also. According to Wikipedia, “it means the shape of a building or object should primarily relate to its intended function or purpose.” I’m not sure what this means, so I take a more practical approach. For me, something has to work first (i.e., function, to do what I designed it to do). When I’m satisfied with how it works, then I’ll think about how it’ll look (i.e., its form)
When I was designing the cabin interior, I knew that I didn’t have a whole lot of room to get too fancy. I still needed some kind of framing for the cabin interior: strong but not too big around. In some ways this framing is similar to building a house. The big difference is that the camper framing won’t experience nearly the same loads as a full sized house. So, instead of using two by fours for the framing, I ripped two by threes in half lengthwise. After some testing, I convinced myself that this smaller framing would be strong enough for the bed: function defined!
Now to Make It Pretty
The framing was mostly designed so the camper will work how I want it to work; shack with storage on wheels to get to/from craft shows. I decided that I would honor the van’s previous life as a delivery vehicle and keep some of the features that made it a delivery van: e.g., the exposed electrical wiring and the metal partition wall between the cabin and the front seats. These features are fine, but they don’t help with covering the interior framing to make the cabin interior pretty.
I’ve had two hardwood floors installed in my house and had left over material both times: chestnut in the kitchen; heart of pine in the living room. My original plan was to use some of this material as the siding in the cabin interior. But this plan changed because the floor seemed to be too “heavy” to be used as, essentially, walls. I needed something thinner than the ¾” leftover flooring, so it was time to search the internet.
Or My Favorite Online Retailer…
Of course, I didn’t have to go too far to find what I wanted. The rustic part of rustic industrial chic comes from “the ol’ homestead” with its weathered boards and tarnished hardware. I didn’t have any boards like that just laying around, but I did find something that would work: Accent Wall in a Box. The boards in this box are half the thickness of the leftover flooring and the variety of colors makes for an interesting interior.
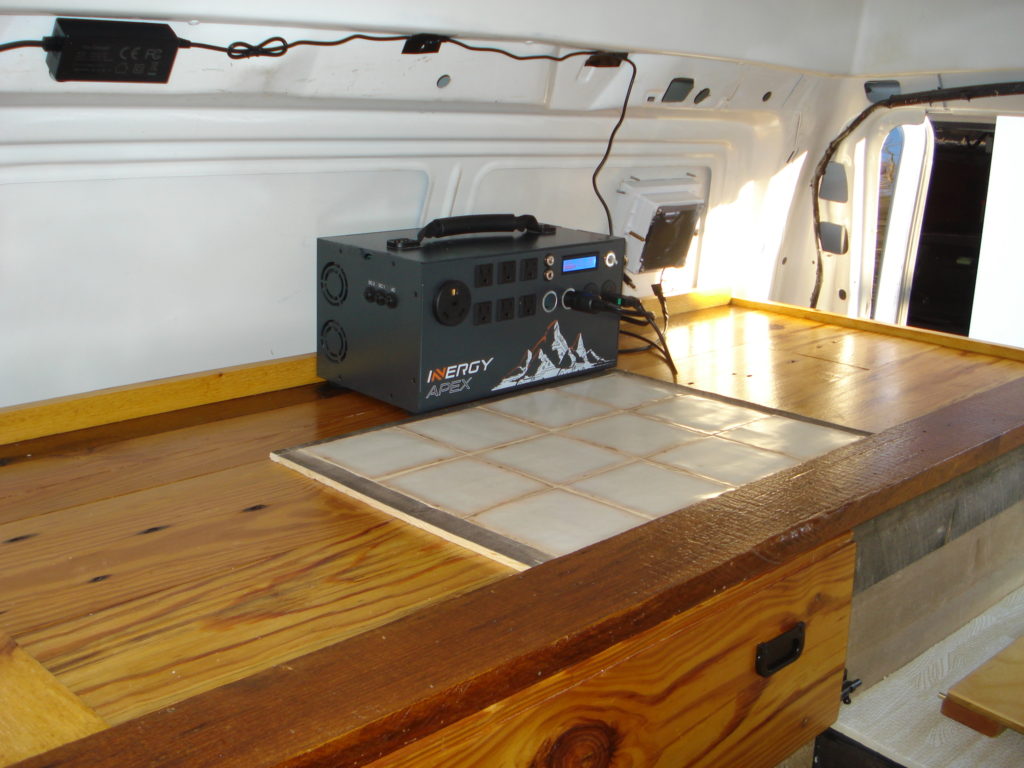
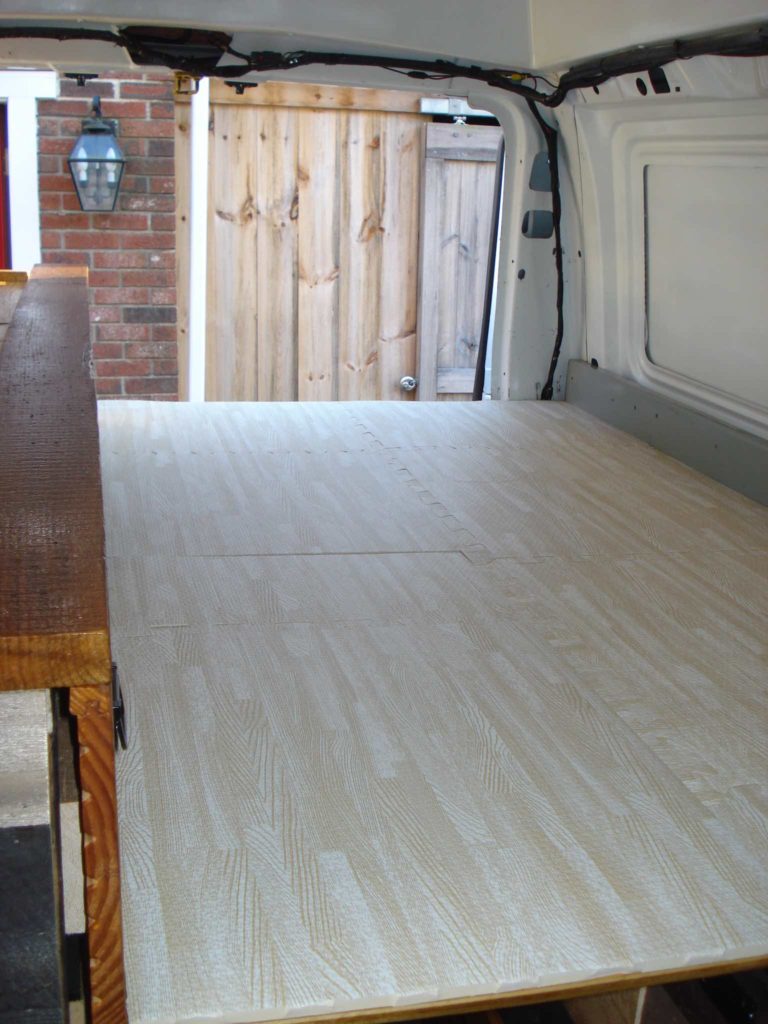
The following photo gives you an idea of how the cabin interior turned out. Facing the back of the camper, on the left of the photo is the Junk Drawer above the refrigerator. On the right are the fronts of the Water Storage Drawer and the Drawer Storage Drawer. The table is shown at the top of the photo, along with its pad when it forms part of the bed, but more on this later.
If you look closely you can see that I was able to use some of the heart of pine flooring as the kick plate all along the floor and as the front of the Junk Drawer. I also got to use it for the countertop, as shown in the feature photo at the top of this post. FYI, the tile in the feature photo is where the camp stove goes if you have to cook out of the rain. It, too, is left over from another household project.
The Wet Stuff
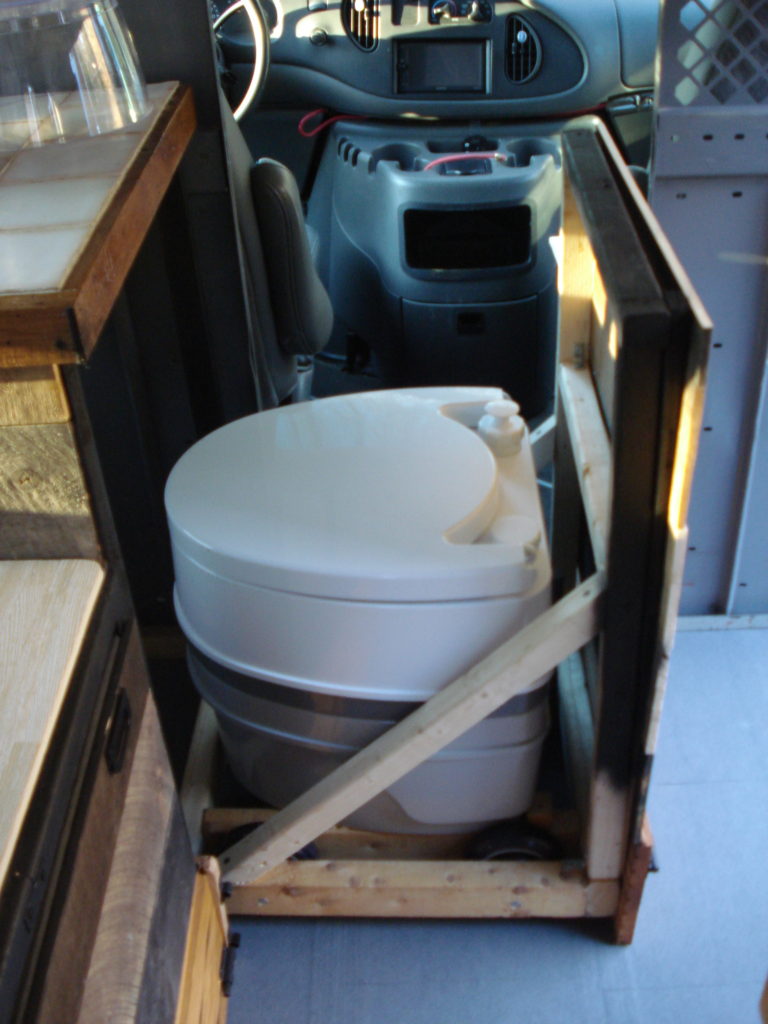
The cabin interior includes a toilet, stowed away in its own pull out (i.e., drawer):
And above the toilet is the sink:
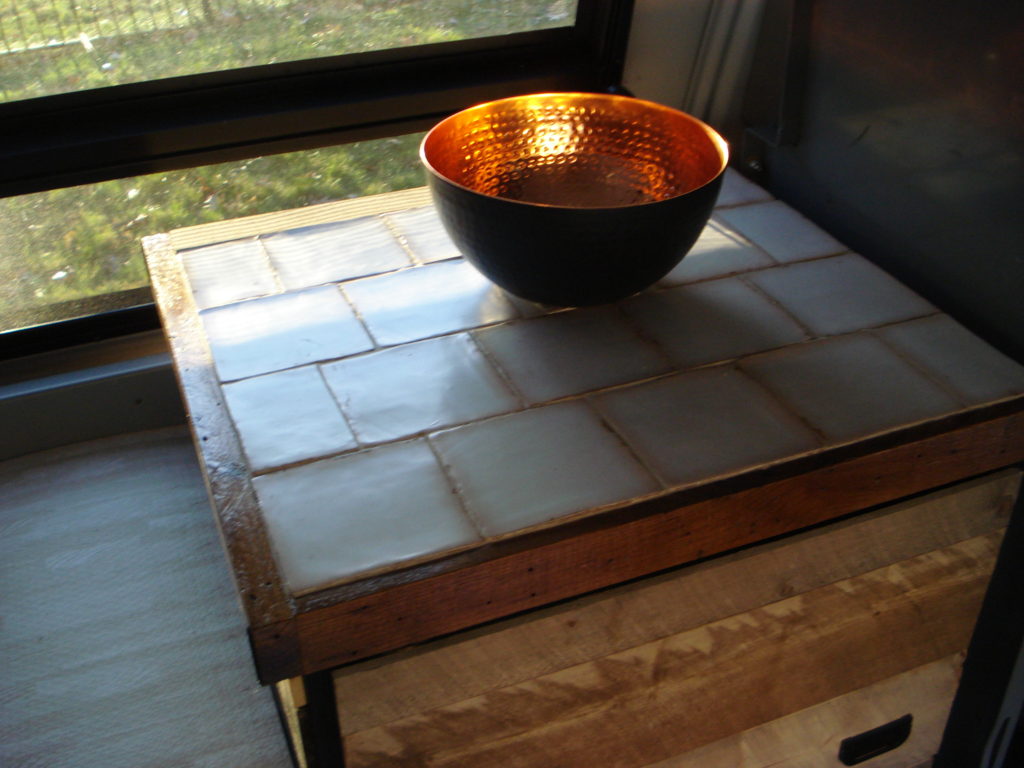
which looks a little like a bowl. BTW, that’s the same tile I used on the countertop, too.
I bought a beverage dispenser to provide “running” water. When the dispenser is assembled, it’s spout is above the rim of the sink. I also installed a pop-up drain in the sink so you can fill it up and drain it when you’re done.
Oh Yeah, That Pesky Table
Way back in Part 3 of this series I talked about “yet another redesign” when I discovered that the original table design was not going to work. The problem then was that I hadn’t appreciated just how confined the cabin interior really is. It’s funny that the solution to the table problem is based on the space being “small enough.”
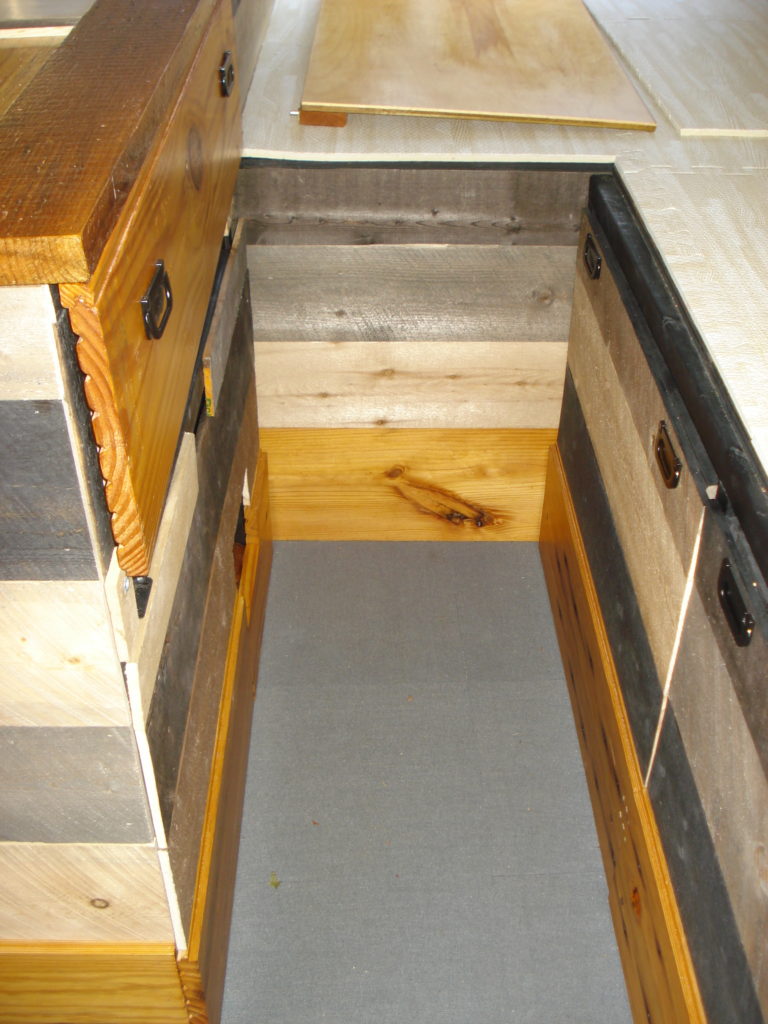
Because of how I wanted to store stuff, there was little choice of where to put the bed. In order to be able to work at the counter (i.e., cook), I had to “cut out” part of the bed. In this case, it was more “make a separate panel” than actually cutting anything out. This is the cabin interior in bed mode:
In this photo, the right side of the panel rests on the framing. There are two shelf support pegs along the left side of the panel. These two pegs fit into two holes in the framing just above the fridge. (In the next photo you can see where the panel rests on the framing.)
And Voila!
Removing the “separate panel” turns the cabin interior into more of a living mode and this is shown in the photo of the cabin interior, above. Turning the “separate panel” into a table relies on those shelf support pegs and the Junk Drawer, as shown below:
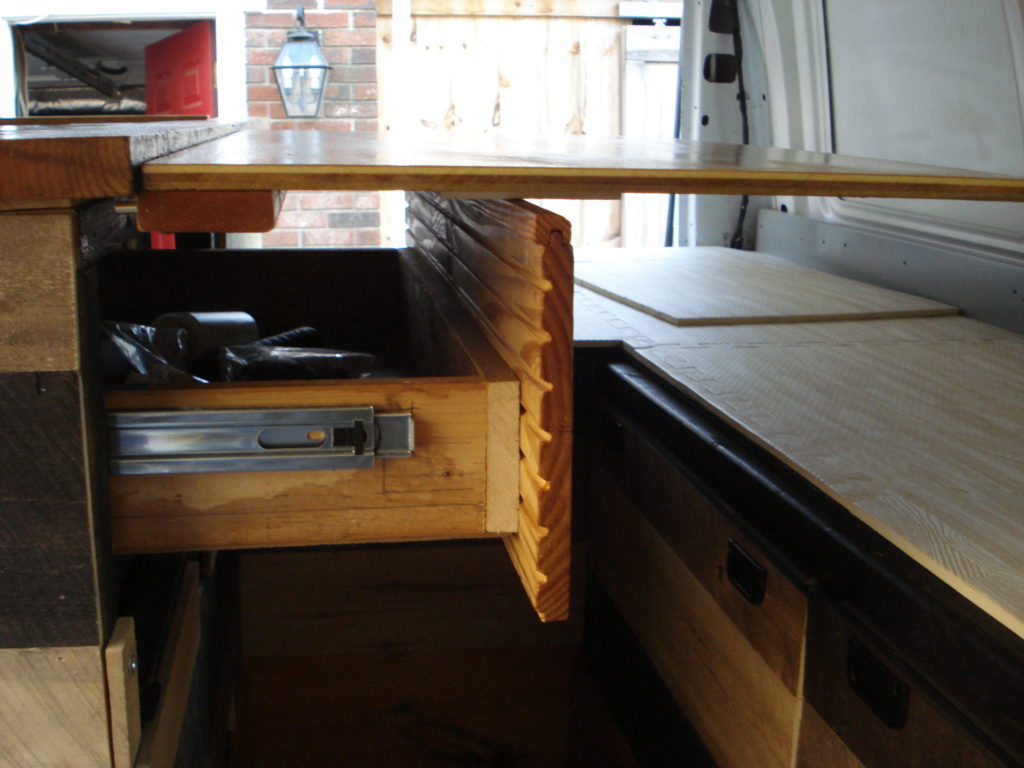
There’s a pad glued to the underside of the table that rests on the open Junk Drawer. If you look close enough to the left side of the table you can see one of the shelf support pegs under the countertop…and now that I think about it, I can improve how those pegs are secured. But that’ll have to wait until the weather warms up a little bit, along with re-writing the van’s operations manual (sigh). See, just like Disney Land; always changing!
And That’s It
The end of Van Conversion Part 5 is just the end of a chapter. The next chapter involves renting the camper to generate a little income. I’ll continue working on the camper so stayed tuned for more posts on FixDit.